2013-2014 CX-5 – HOOD VIBRATION WHILE DRIVING AT HIGHWAY SPEED
APPLICABLE MODEL(S)/VINS
2013-2014 CX-5 vehicles with VINs lower than JM3KE******387092 (produced before September 1, 2013)
Hood vibrates when driving at speeds of 110 Km/h (68 mph) or more.
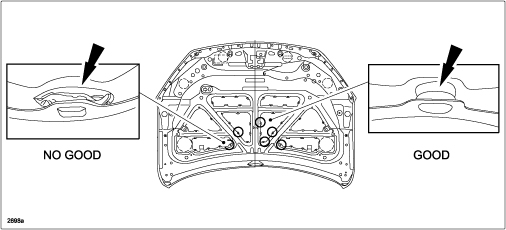
The amount of sealant used to fill in the space between the inner frame and outer panel at the bottom area of the hood is insufficient.
If the sealant detaches (as shown below on the left), it may cause the hood to vibrate.
The amount of sealant has been increased during vehicle production and the preload force of the cowl grill seal has been increased to eliminate the concern.
REPAIR PROCEDURE
The cowl grill seal will be replaced with a modified part, additional dampening material may be applied between the hood’s inner frame and outer panel and the hood height may be adjusted to apply additional tension.
NOTE:
- This repair should be performed by a qualified technician or body shop.
- DO NOT use any other products for this repair, such as panel bonding glue, which is too strong for this type of repair.
- Open the hood and secure it with the support rod.
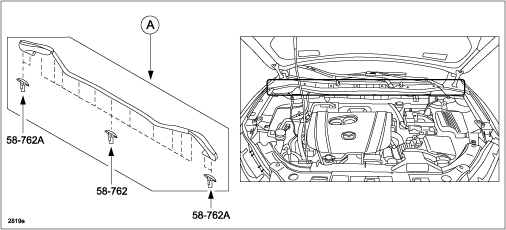
- Replace the cowl grill seal (A) with a modified one with increased preload force.
NOTE: The cowl grill seal is attached to the cowl grill with 15 clips.
- Inspect if the factory applied sealant between the outer panel and the inner frame at the back of the hood is separated.
- If the sealant is separated, go to step 4.
- If the sealant is not separated, go to step 20.
- Remove the hood insulator according to the MS3 online instructions or the Workshop Manual (section 09-10).
- Confirm the ten (10) original sealant spots at the bottom area of the hood.
NOTE:
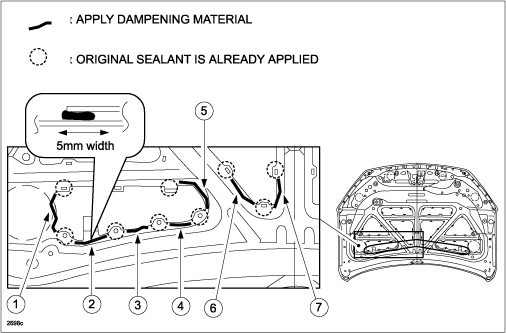
- Additional dampening material will be applied between these ten (10) original sealant spots.
- It is not necessary to apply dampening material to other areas of the hood. Even if the original sealant has become detached, it will have no influence on the hood vibration concern.
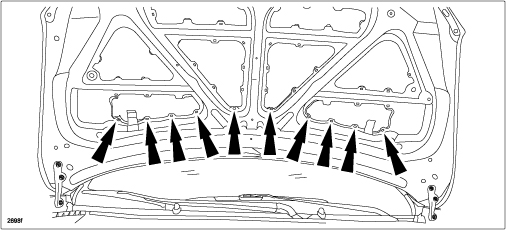
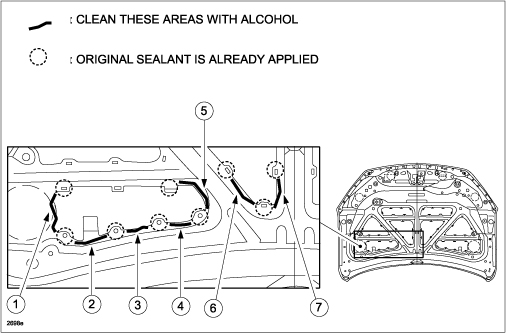
- Using alcohol (of at least 50% content) and cotton swabs (or equivalent), thoroughly clean the fourteen (14) areas (shown below) between the hood’s inner frame (A) and outer panel (B).
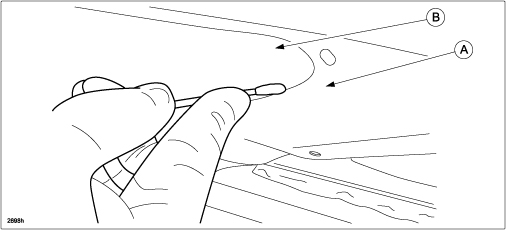
NOTE: There are seven (7) areas on the left side of the hood and seven (7) areas on the right side of the hood to be cleaned (left side shown below).
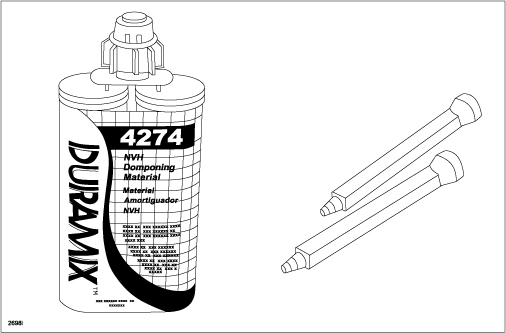
- Locally obtain the following materials to perform the repair:
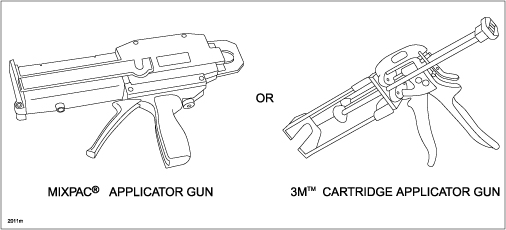
NOTE: Either applicator gun can be used, however, the 3M cartridge applicator gun is normally less expensive than the Mixpac applicator gun.
- Insert Duramix NVH Dampening Material (04274) into applicator gun and remove the cap and insert.
NOTE: Do not discard the cap or insert.
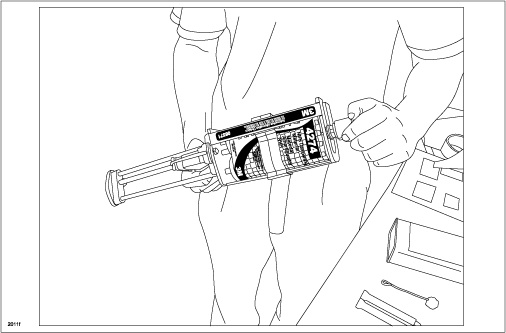
- Begin squeezing the applicator gun trigger until clear dampening material starts to come out of one side.
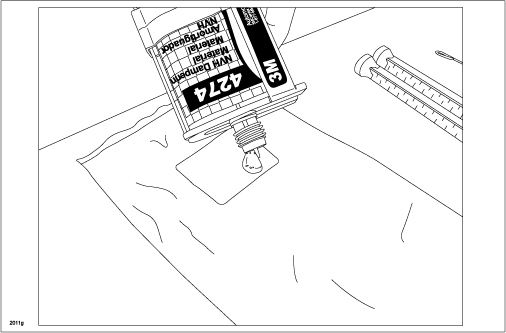
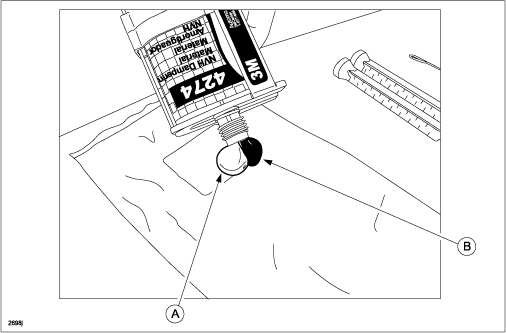
- Continue squeezing the trigger until dampening material (A) and hardener (B) come out equally.
NOTE: This ensures dampening material and hardener are correctly mixed and will harden properly.
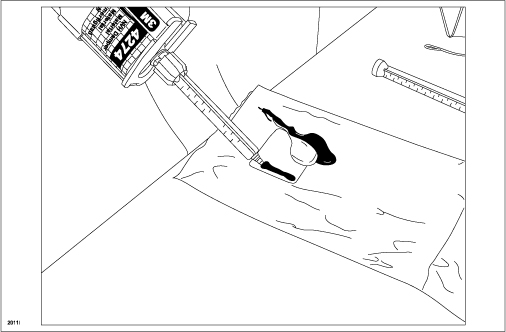
- Insert the mixing nozzle onto the tip of the dampening material, then screw in the removed cap and tighten.
- Squeeze the trigger until a small amount of material comes out.
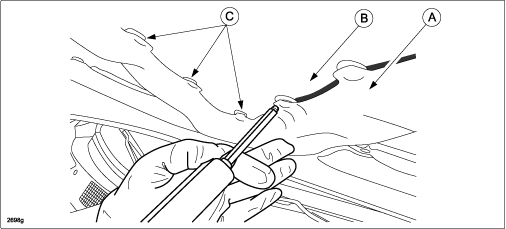
- Apply a 5 mm wide bead of dampening material by pushing and filling it into the space between the inner frame (A) and outer panel (B) between the original sealant spots (C).
NOTE: It is recommended that a pair of protective rubber gloves be put on before applying the dampening material.
NOTE:
- Ensure the dampening material adheres to the inner frame and outer panel.
- Dampening material must be applied to a total of fourteen (14) locations, (seven (7) on the left and seven (7) on the right sides of the hood) as shown below.
- It is not necessary to apply dampening material over the original sealant spots, even if the original sealant has become detached.
NOTE:
- One (1) Duramix NVH Dampening Material (04274) contains enough material to repair two (2) vehicles.
- Any dampening material run-off should be removed.
- Remove and discard the mixing nozzle.
- Reinstall the insert and cap onto the dampening material.
- Once the repair has been completed, leave the hood open and allow the dampening material to dry for at least six (6) hours when applied in ambient temperatures of 70 degrees F (21 degrees C).
NOTE:
- DO NOT press on the outer side of hood while the dampening material is drying.
- DO NOT slam hood closed while the dampening material is drying. It could break the bond.
- Adjust the hood height by turning the rubber stoppers on the hood (2 stoppers) and body side (2 stoppers).
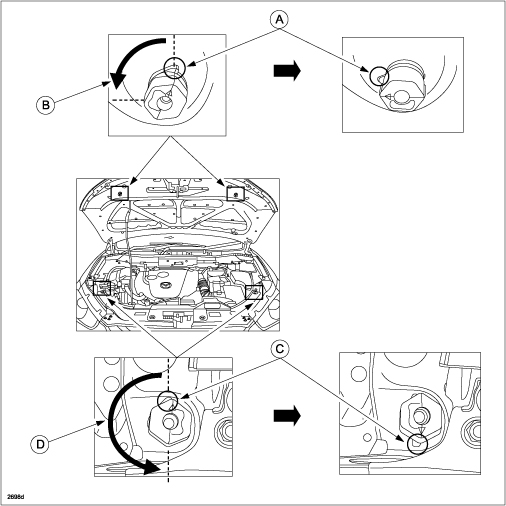
- After the dampening material has completely dried, close the hood and check the clearance between the hood and both front fenders according to the Body Shop Manual [CONSTRUCTION STANDARD VALUES].
- Reinstall the hood insulator according to the MS3 online instructions or the Workshop Manual (section 09-10).
- Road test the vehicle to verify the hood vibration has been eliminated.
PART(S) INFORMATION
| Part Number | Description | Qty. | Notes |
| KD53-56-760A | Cowl grill seal | 1 | — |
04274
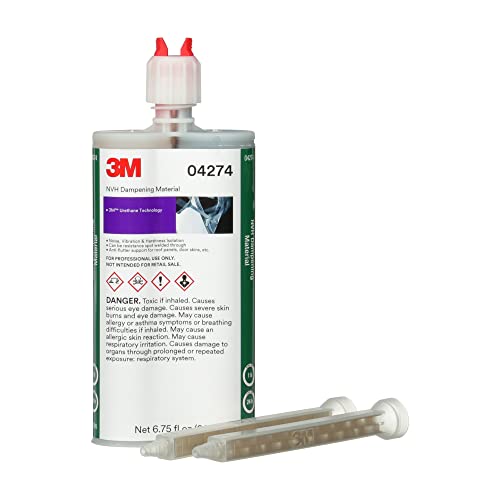
3M NVH Dampening Material 04274, Flexible, Non-Shrink, 200 mL Cartridge
| Duramix NVH Dampening Material – 6.25 fl. oz. (200 ml.) | 1 | Includes two (2) mixing nozzles |
08571
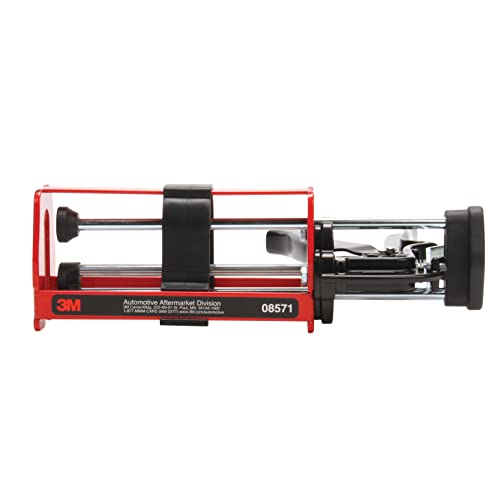
3M Manual Cartridge Applicator, 08571, 200 ml
| 3M Cartridge Applicator Gun | 1 | — |
08117
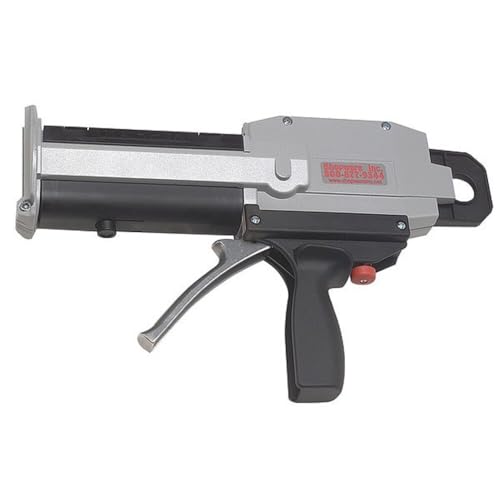
3M Performance Manual Applicator, 08117, Accurately Dispense Materials, Steady Application, 200 ml
| MixPac Applicator Gun | 1 | — |
08193
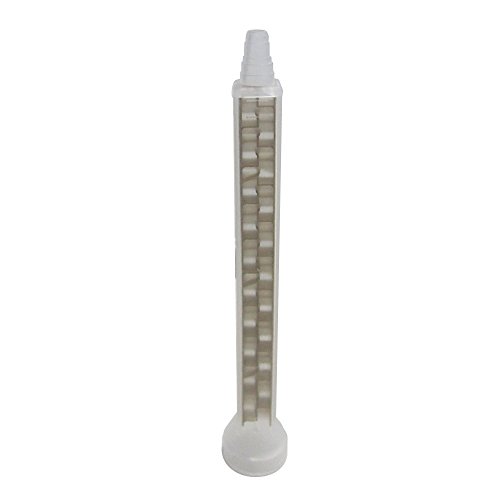
3M 8193 Mixing Nozzle, Cascade Mix/Meter Nozzle, Manual/Pneumatic Applicator Use, 1 Pack, 6/Bag
| Automix Mixing Nozzle | 1 | Order replacement nozzles as necesssary. Includes six (6) nozzles |

- 3M General Support: (800) 524-6429
- 3M Technical Support: (877) 666-2277

- Cost-Effective Solution: Save thousands of dollars compared to buying a new hood for your vehicle
- Superior Strength: Heavy-duty aluminum castings provide stronger durability than original equipment
- Compatibility Notice: Designed specifically for LONG hood ONLY and does not fit short hood T880 models
- Paint Preservation: Eliminates the need to repaint a new hood because you are repairing the existing hood
- Complete Repair Kit: Includes cast aluminum strut-bracket mounts and PlastiFix high performance methacrylate adhesive for secure bonding

- Cost-Effective Solution: Save thousands of dollars compared to buying a new hood for your KW T880
- Superior Strength: Heavy-duty aluminum castings are stronger than original factory components
- Compatibility Notice: Designed for SHORT hood ONLY and does not fit long hood T880 models
- No Repainting Required: Eliminates having to repaint a new hood because you are repairing the existing hood
- Complete Repair Kit: Includes cast aluminum strut-bracket mounts and PlastiFix high performance methacrylate adhesive for secure bonding and installation

- Cost-Effective Solution: Repair the hood instead of replacing the hood
- Quick Turnaround Time: Get back on the road quickly instead of waiting on parts to arrive
- No Repainting Required: Eliminates having to repaint a new hood because you are repairing the existing hood
- Durable Repair Components: Features cast aluminium pocket plugs and steel reinforcing plate that are bolted and bonded into place for long-lasting strength
- High Performance Adhesive Included: Comes with PlastiFix high performance methacrylate adhesive to ensure a secure and reliable bond for the repair

- No Paint Required: With the KW long-hood spring-pocket repair kit, there is no need to paint the hood. Replacing the hood requires you to paint the hood to match
- Enhanced Durability: Stronger than the original spring pockets. Load is spread out over a much larger area
- Cost-Effective Solution: Repair the broken-out spring pockets on your KW W900 for a fraction of the cost of replacing your damaged hood
- Complete Repair Kit: This repair kit comes with both aluminum plugs, adhesives, and screws for a comprehensive repair solution
- American Manufacturing: Designed and manufactured in the USA specifically for KW W900 Metton hood spring pocket repairs

- Universal Compatibility: The automotive paint stand is designed to accommodate a wide range of vehicle parts, for fenders, bumpers, automotive panels, hoods, doors, and more, making it a versatile addition to your repair or painting setup
- Rotating Design: The rotating feature allows for 360-degree access to parts, facilitating easier painting and repairs from all angles, ensuring a more efficient workflow. With a robust 300 lbs weight capacity, it securely holds heavy components, giving you confidence and stability for demanding tasks
- Folding Design: The portable and foldable design makes it easy to store when not in use and convenient to transport, ideal for shops with limited space or for mobile use
- Adjustable Hooks: Equipped with adjustable hooks, the stand can securely hold various panel sizes and shapes, providing a custom fit for different vehicle components
- Package & Easy Assembly: You will receive 1 x Automotive Paint Stand. With galvanized surface finish, it is durable, easy cleaning and hard to rust. According to the instruction and accessories included, you can assemble it on your own. Note: Please check the product dimensions (shown in the picture) before purchasing
This product presentation was made with AAWP plugin.