
2004-2011 RX-8 Passenger Air Bag Inflator Concern – Safety Recall 2618F
A. VEHICLE INSPECTION PROCEDURE
Verify that the vehicle is within the 2004-2005 or 2006-2011 Model/Year range:
–If the vehicle is within the 2004-2005 Model/Year range, proceed to Repair Procedure B Page 2.
-If the vehicle is within the 2006-2011 Model/Year range, proceed to Repair Procedure C Page 14.
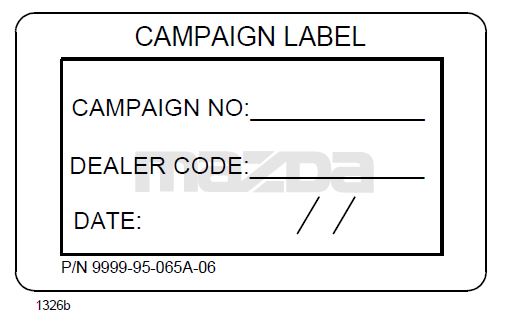
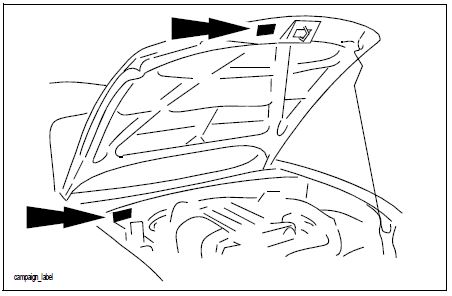
– Perform a Warranty Vehicle Inquiry using your eMDCS System and inspect vehicle for Campaign Label Recall 2618F attached to the vehicle’s hood or bulkhead. Refer to eMDCS System – Warranty Vehicle Inquiry Results table below.
NOTE: Be sure to verify Recall number as the vehicle may have multiple Recall labels.
 |  |
eMDCS System – Warranty Vehicle Inquiry Results:
| If eMDCS displays: | Campaign Label is: | Action to perform: |
| RECALL 2618F OPEN | Present | Email Dealer Recall Help or
Contact Warranty Hotline at (877) 727-6626 option 3 to update vehicle history. |
| Not present | Proceed to “B. REPAIR PROCEDURE”. | |
| RECALL 2618F CLOSED | Present | Return vehicle to inventory or customer. |
| Not present | Proceed to “C. CAMPAIGN LABEL INSTALLATION”. | |
| RECALL 2618F IS NOT PRESENT | Does not apply | Recall does not apply to this vehicle. Return vehicle to inventory or customer. |
1. REPAIR PROCEDURE: Air Bag inflator Replacement Procedure
RX-8(FE): 2004-2005MY ONLY (Part Number: F1Z2-57-K80)
Parts Information: The service parts are available in one box.
Inflator APPS-7
Nuts(x4)
Collar C
Collar A
Stopper Plate
Felt Tape(x2)
CE Label Discard
Outline:
- Remove the inflator from Air Bag Module, then replace it with a modified one.
- Return the removed inflator with the following manner and caution.
Caution:
- Replaced Inflators must be returned. Be sure to keep the carton box which was used to deliver the new inflator. This box is a mandatory for shipping special goods like airbag related parts / inflator.
- Pack the removed inflator in this box exactly in the same manner as the new inflator was packed.
Repair Procedure B:
Warning:
- Perform the replacement in a clean environment. Oil, grease, water, etc on components may cause the air bag modules to fail to deploy in the event of an accident, which may cause serious injury. Do not allow oil, grease, water, etc., spill or get in contact with the airbag components. * Inserting a screwdriver, etc., into the connector of an air bag module may damage the connector and cause the air bag module to deploy improperly, which may cause serious injury. Do not insert any foreign objects into the connectors.
- Do not disassemble the vehicle part other than instructed here.
- Do not make an attempt to directly supply electric power to the module and the inflator.
- Keep the module facing of the pad surface upwards anytime, except while performing replacement work.
- Do not use the module and new inflator if they happen to fall on the ground.
- Avoid exposing the module and inflator to temperatures exceeding 194 degrees Fahrenheit.
Remove the air bag module assembly.
- Turn the ignition switch to the LOCK position.
- Disconnect the negative battery cable and wait for 1 min or more.
- Remove the glove compartment.
(1) Pull the stay damper in the direction shown in the figure, and detach the connecting part between the glove compartment and the stay damper.
(2) Press the stopper in and remove it.
(3) Lower the glove compartment.
(4) Detach the clips from the dashboard and remove the glove compartment.
- Remove the Air Bag Module.
Note: The Air Bag Module cover in many vehicles may be sun damaged, however this is not covered under the recall. Be careful when handling so that any crack does not get worse.
(1) Remove the bolts
(2) Disconnect the connector
(3) Remove the Air Bag Module
Replace the Inflator:
- Using a flathead screwdriver, pry out the connector stopper plate. Then disconnect the connector.
- Loosen the four nuts with non-power tools until the upper surface of the nuts is aligned with the top edge of the screw thread of bolts.
- If necessary, for easier inflator removal, depress the four nuts to make a gap between the inflator and air bag module.
Note: Do not depress exessively as the module body may be damaged.
- Remove the nuts(X4), then move the stopper plate from the air bag module. Discard the removed four nuts and stopper plate.
- Push the inflator end by thumbs then remove it sliding in the direction as shown.
Caution: Return the removed inflator with required information and pack it in the same carton which the replacement part was sent in.
- Paste the felt tape to Straight area (Orange area) the retainer. (Paste in two places)
Note: Do not extend outside the Red line (bolt side), in order to prevent tool contact when tightening the nut.
- Fold it in half and paste it inside the retainer. Make it the same on both sides.
- Attach the collar A and C to replacement inflator.
(Location of the collar A: The position is the 1st stage side of the inflator.)
(Location of the collar C: The position is the 2nd stage side of the inflator.)
- Insert to align the side of the retainer and guide line (Black line) of replacement inflator.
Align guide line (Black line) with retainer edge.
- Insert the inflator up to the position where it touches the stopper.
The connector direction is 15 ° from the bottom of the retainer.
- Set the new stopper plate (A) by gently pushing until it touches with the inflator side (B).
- Keeping the condition above, tighten the new nuts by fingers first, then to the specified torque by hand tool in the order of (1) – (2) – (3) – (4) shown in the figure. DO NOT USE ANY POWER TOOL AS YOU MAY
SHEAR THE STUDS
Tightening Nut Torque: 3.9 ± 0.4 Nm
- Ensure the connectors are fitted properly.
Install the Air Bag Module:
- Re-connect the connector, then install the Air Bag Module.
(1) Tighten the bolts.
Tightening Torque: 7.9 – 11.7 Nm
- Install the glove box.
- Connect the negative battery cable.
- Turn the ignition switch to the ON position.
- Verify that the air bag system warning light illuminates for approximately 6 seconds, and goes out.
- If the air bag system warning light does not operate, refer to the onboard diagnostic system (air bag system) and perform inspection of the system.
C. CAMPAIGN LABEL INSTALLATION
- Fill out a blue “Campaign Label” (9999-95-065A-06) with:
CAMPAIGN NO: 2618F
DEALER CODE: Your dealer code DATE: Today’s Date.
- Affix it to the hood or bulkhead as shown:
- Return the vehicle to customer.
C. REPAIR PROCEDURE: Air Bag Module Replacement Procedure
RX-8(FE): 2006-2011 MY ONLY (Part Number: FEZ8-57-K70) Parts Information: The service parts are available in one box.
Air Bag Module APPS-7
Outline:
- Remove the air bag module, then replace it with a modified one.
- Return the removed inflator with the following manner and caution.
Caution:
- Replaced Inflators must be returned. Be sure to keep the carton box which was used to deliver the new inflator. This box is a mandatory for shipping special goods like airbag related parts / inflator.
- Pack the removed inflator in this box exactly in the same manner as the new inflator was packed.
Repair Procedure C:
Warning:
- Perform the replacement in a clean environment. Oil, grease, water, etc on components may cause the air bag modules to fail to deploy in the event of an accident, which may cause serious injury. Do not allow oil, grease, water, etc., spill or get in contact with the airbag components.
- Inserting a screwdriver, etc., into the connector of an air bag module may damage the connector and cause the air bag module to deploy improperly, which may cause serious injury. Do not insert any foreign objects into the connectors.
- Do not disassemble the vehicle part other than instructed here.
- Do not make an attempt to directly supply electric power to the module and the inflator.
- Keep the module facing of the pad surface upwards anytime, except while performing replacement work.
- Do not use the module and new inflator if they happen to fall on the ground.
- Avoid exposing the module and inflator to temperatures exceeding 194 degrees Fahrenheit.
Remove the Air Bag Module Assembly.
- Turn the ignition switch to the LOCK position.
- Disconnect the negative battery cable and wait for 1 min or more.
- Remove the glove compartment.
(1) Pull the stay damper in the direction shown in the figure, and detach the connecting part between the glove compartment and the stay damper.
(2) Press thePress the stopper in and remove it.
(3) Press theLower the glove compartment.
(4) Press theDetach the clips from the dashboard and remove the glove compartment.
- Remove the Air Bag Module Assembly.
Note: The Air Bag Module cover in many vehicles may be sun damaged, however this is not covered under the recall. Be careful when handling so that any crack does not get worse.
(4)Remove the bolts
(5)Disconnect the connector
(6)Remove the Air Bag Module Assembly
Replace the air bag module:
- Remove the nuts (X2).
(This photo is without INFLATOR)
- Remove Plate and Air Bag Module.
- Remove webbings from Air Bag Module.
- Attach the both webbings to the retainer hooks of new replacement module.
- Install the replacement module.
(1) Set the webbing below.
(2) Set the webbing on the below.
(3) Pass the retainer hook through the hole in the LID.
(4) Attach the plate to the retainer hook.
Fasten the M6 replacement Nuts in 2 locations with hand tools only. (Red circle)
Install the Air Bag Module Assembly:
- Re-connect the connector, then install the air bag module.
(1) Tighten the bolts.
Tightening Torque: 7.9 – 11.7 Nm
- Install the glove box.
- Connect the negative battery cable.
- Turn the ignition switch to the ON position.
- Verify that the air bag system warning light illuminates for approximately 6 seconds and goes out.
- If the air bag system warning light does not operate, refer to the onboard diagnostic system (air bag system) and perform inspection of the system.
C. CAMPAIGN LABEL INSTALLATION
- Fill out a blue “Campaign Label” (9999-95-065A-06) with:
CAMPAIGN NO: 2618F
DEALER CODE: Your dealer code
DATE: Today’s Date.
- Affix it to the hood or bulkhead as shown:
- Return the vehicle to customer.
Remedy Instructions and TSB
RCRIT-19V781-3586.pdf 1352.749KB
- [Easy to Use—Work Out of the Box] + [FOXWELL 2026 New Version] FOXWELL NT604 Elite scan tool is the 2026 new version from FOXWELL, designed for car owners who want to figure out the cause of issues before fixing car problems by scanning common systems like ABS, SRS, engine, and transmission. The NT604 Elite obd2 scanner diagnostic tool comes with the latest software—no need to waste time downloading software first. Plug the scanner into the OBDII port with OBDII cable to start the diagnosis.
- [Affordable] + [Reliable Car Health Monitor] Will you be confused what happens when the warning light of ABS/SRS/transmission/check engine flashes? Instead of taking your cars to dealership, this FOXWELL scanner will help you do a thorough scanning and detection for your cars and pinpoint the root cause. Note:The device is a diagnostic tool, not a repair tool. To turn off a warning light, you must first physically repair the issue causing it. Only then can the scanner be used to clear the corresponding fault code.
- [5 in 1 Car Diagnostic Scanner] Compared with obd scanners (50-100), NT604 Elite code scanner not only includes their OBDII diagnosis but also serves as ABS/SRS scanner, transmission and check engine code reader. When it’s an odb2 scanner, you can use it to check if your car is ready for annual test through I/M readiness menu. In addition, live data stream, built-in DTC library, data play back and print, all these features are a big plus for it. Note: doesn't support maintenance functions like reset or relearn. For the SRS system, NT604 Elite can read and clear common fault codes not caused by a crash, but crash/collision data cannot be cleared.
- [Fantastic AUTOVIN] + [No extra software fee] Through the AUTOVIN menu, this NT604 Elite car scanner allows you to get your V-IN and vehicle info rapidly, no need to take time to find your V-IN and input one by one. What's more, the NT604 Elite ABS SRS scanner supports 60+ car brands from worldwide (America/Asia/Europe). You don’t need to pay extra software fee. AUTOVIN may not work on some older vehicles or certain vehicle brands. If AUTOVIN fails, please input the vin code manually or go to the Diagnostic Menu to select your vehicle model.
- [Solid protective case KO plastic carrying bag] + [Lifetime update] Almost all same price-level car scanner diagnostic tool only offers plastic bag to hold the scanner.However, NT604 Elite automotive scanner is equipped with solid protective case, preventing your obd2 scanner from damage. Then you don’t need to pay extra money to buy a solid toolbox.
- 【Reset ABS/SRS/Transmission/Engine Lights】 More than an check engine code reader, OBDMATE OM901 obd2 scanner performs comprehensive diagnostics for the 4 most-used systems (ABS/SRS/Engine/Transmission). It quickly clears fault codes, turns off warning lights, read data stream and auto VIN.
- 【3.5" Handheld Scanner with 4 System Diagnose】 3.5" Super large TFT screen equipped displays an intuitive menu and clear readings of various sensors from ABS, SRS, ECM and TCM systems. It arrived with a silicone protective case and hard-shell carrying case, ensuring long-lived durability and drop resistance. The car diagnostic tool is plug-to-play designed, plug it and get diagnosis started without any batteries or updates required.
- 【One-Click I/M Readines&Full OBD2 Functions】 Press F1 to get an intuitive corloured form about whether various emissions-related systems on the vehicle are operating properly. Help you get smog-check ready quickly. OM901 car scanner supports all essential OBD2 functions you need: read & clear codes, view freeze frame, read I/M readiness, retrieve VIN, live data stream (with graphing display), O2 sensor test, onboard monitoring mode, and EVAP leak test.
- 【Battery Voltage Check&DLC Pin Test】 It allows you to monitor battery health by testing current battery voltage. Plus, this obd2 diagnostic tool features DLC 16-PIN test to check current voltage of every pin.
- 【Automotive Scanner Diagnostic Kit】 The package comes with 1 car scanner, 1 USB-type c cable, 1 hard storage bag and 1 user manual(en). Free to update without any hidden fees. 5 languanges available in setting including English, French, Italian, German and Espanish. Valuable and Portable, making it a great tool kit for car owners, DIY enthusiasts, and professional mechanics.
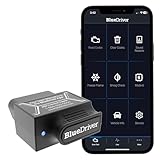
- [Diagnose Like a Pro] BlueDriver Pro is a professional OBD2 scanner and diagnostic tool that helps you scan, understand, and clear vehicle trouble codes with confidence. Turn your phone into a powerful car diagnostic scanner—no guesswork, no unnecessary repairs.
- [Read and Clear More Codes Than Ever] Read and clear more codes than basic car code readers. Access enhanced diagnostics for Check Engine, ABS, SRS, Airbag, TPMS, Transmission.
- [Verified Fixes and Real-Time Data] Get unlimited, technician-verified repair reports matched to your VIN, with definitions, causes, and confirmed fixes. Monitor live vehicle data as you drive, view freeze frames, check smog readiness, and analyze Mode 6 test results.
- [Wireless & Bluetooth Enabled] - Say goodbye to wires. BlueDriver connects with Bluetooth via your phone/tablet to a sensor that plugs into your car's OBDII port. Get all of the capabilities of an expensive code reader & scan tool without any annoying wires.
- [Broad Make & Model Coverage] Strong support for GM, Ford, Stellantis (RAM, Jeep, Chrysler), Toyota, Honda, Nissan, Mazda, Subaru, Hyundai, Mercedes-Benz, BMW, and VW.
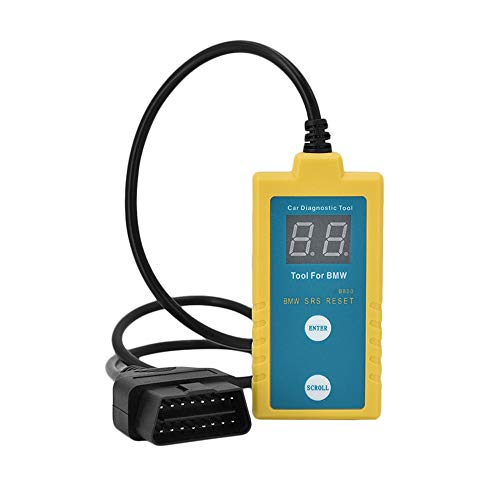
- ✔️【Professional SRS Reset for 1994-2003 BMW】 Designed specifically for classic BMW models (1994-2003). This B800 scanner reads & clears SRS airbag fault codes, turns off the warning light, and saves you a costly dealer visit. Confirmed compatible with: E36, E46 (EXCEPT 2001 330i), E34, E38, E39, Z3, and X5 (E53). NOT compatible with any BMW built before 1994 or after 2003.
- ✔️【Important: Two Different Connection Ports – Read Before Use】 To avoid “not working” issues, please note: For 1994–2000 BMWs (most E36, E34, Z3, early E39), the SRS diagnostic port is a round 20-pin connector under the hood. You MUST use the included 16-pin to 20-pin adapter cable. For 2000–2003 models (late E46, E39, X5), use the standard OBD-II port inside the cabin. Incorrect connection is the #1 reason for “incompatibility” reports.
- ✔️【Read & Clear Fault Codes in Minutes】 Quickly diagnose why your SRS light is on. The scanner accurately reads fault codes from airbag and seatbelt pretensioner systems. With one button press, clear the codes and reset the SRS warning light in seconds. No expensive dealer tools needed.
- ✔️【User-Friendly for DIYers – No Mechanic Required】 Easy operation with an intuitive button layout: ‘Enter’ to confirm, ‘Scroll’ to navigate. The clear LCD screen shows results instantly. Includes a step-by-step manual (revised for clarity) to guide you through the entire reset process.
- ✔️【Reliable Support with 1-Year Warranty】 We stand behind the quality of our B800 scanner. It comes with a 1-Year Hassle-Free Warranty. If you have any questions or need support, please contact us with your Order ID, and our dedicated team will assist you promptly.
- [All System Diagnostics, Professional-Level Scanner] - BLCKTEC 460T is the ultimate OBD2 diagnostic tool for home mechanics and professionals. It supports all 10 OBD2 modes, reads and clears Engine/Transmission/ABS/SRS codes, performs All-System Diagnostics, offers workshop reset tools, and provides real-time live data. It helps you pinpoint issues, assess your car's condition, and prepare for SMOG checks with ease. NOTE: Function availability depends on your vehicle. Before you buy, be sure to use the Compatibility Checker on BLCKTEC website or contact our customer support to verify that the features you need are supported for your vehicle’s specific year, make, and model.
- [12+ Most Popular Reset Functions] - BLCKTEC 460T OBD2 scanner offers 12+ dealer-level service functions, including Oil Maintenance Reset, ABS Bleeding, EPB Reset, SAS(Steering Angle Sensor) Recalibration, DPF(Diesel Particulate Filter) Reset, Throttle Body Relearn, Battery Reset/Initialization, TPMS Relearn, Transmission Reset, Fluid Change Reset, Maintenance Reset and more, enabling you to perform workshop services like a pro. NOTE: Function availability depends on your vehicle. Be sure to use the Compatibility Checker on BLCKTEC website to verify that the features you need are supported for your vehicle.
- [Real-Time OBD2 and OEM Live Data, Freeze Frame Data] - BLCKTEC 460T helps diagnose vehicle issues when warning lights like Check Engine Light or ABS/SRS Light appear. It offers detailed DTC info, ECU Freeze Frame Data, and real-time OBD2 and advanced OEM live data, including Engine, Transmission, ABS, SRS, and more, making it easy to diagnose and resolve vehicle problems. You can view, graph, record, replay, and overlay up to four live data streams in a single graph for better analysis.
- [AutoVIN, AutoReLink, AutoScan, 3X Faster] - Equipped with AutoVIN technology, 460T automatically retrieves the VIN to save you time. Its AutoScan and AutoReLink features scan all of the vehicle's ECUs and detect any fault codes immediately after you plug the scanner into the vehicle's OBD2 port - no button presses required. Additionally, it regathers DTC and I/M readiness information every 30 seconds, simplifying monitor tests. 460T's advanced technology makes it 3X faster than other products.
- [Get RepairSolutions2, the #1 Auto Repair App for Free] - When paired with RepairSolutions2(RS2) App, 460T becomes even more powerful. RS2's Verified Fix Database built by master technicians, provides the parts needed for the repair. Additionally, RS2 gives you access to OEM warranty info, maintenance schedules, TSB, and dealership recall info, making car care easier than ever. RS2 is free with no subscription fees and it stores your car scan reports in the cloud, allowing you to access, share, or print them anytime and anywhere.
This product presentation was made with AAWP plugin.