| “This site contains affiliate links for which OEMDTC may be compensated” |
2014-2015 MAZDA6 – WATER ENTRY INTO TRUNK LID LIGHT DURING HIGH PRESSURE CAR WASH
APPLICABLE MODEL(S)/VINS
2014-2015 Mazda6 vehicles with VINs lower than JM1 GJ ****** 170534 (produced before January 29, 2014)
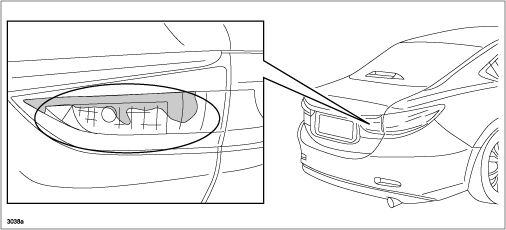
Water enters into the trunk lid light while washing the vehicle with high pressure.
Water may enter through the trunk lid light gasket and the body panel.
REPAIR OUTLINE
NOTE: New trunk lid light includes gasket and the solid rubber.
REPAIR PROCEDURE
- Is customer concern due to Water Entry or Condensation?
- Water Entry – Go to step 2.
- Condensation – This information does not apply. DO NOT replace the trunk lid light. Explain to the customer that this is a natural phenomenon and not a quality defect. Refer to CONDENSATION / FOG IN FRONT AND REAR COMBINATION LAMPS.
- Remove the trunk lid light. Refer to MS3 online or Workshop Manual section 09-18.
- Prepare 1.5 liter of hot water [around 104 degrees Fahrenheit (40 degrees Celsius)] per trunk lid light.
- From the bulb installation hole, pour in just enough hot water (about 400cc) to cover the half level of trunk lid light.
- Add one or two drop of neutral detergent in the trunk lid light.
NOTE: Use liquid type neutral detergent for dish/hand etc. washing only. DO NOT use alkali or acid type detergent.
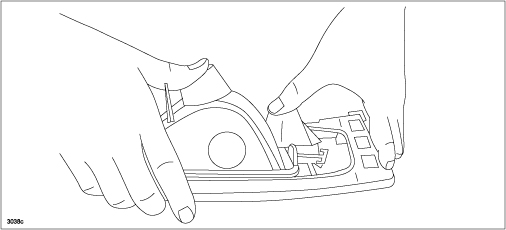
- Plug the bulb installation hole with your thumb then shake the trunk lid light in all directions as shown in the below figure to remove dirt adhering to the lens.
- Rinse the inside of the trunk lid light with hot water [around 104 degrees Fahrenheit (40 degrees Celsius)] until foam has disappeared.
- Drain off the water and shake the trunk lid light well until no water drops come out.
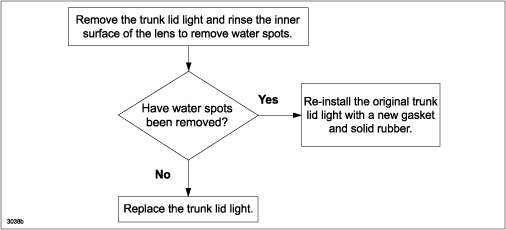
- Are there water drop stains in the inner surface of the lens?
- No – Proceed to step 10.
- Yes – Replace the trunk lid light. Refer to MS3 online or Workshop Manual section 09-18.
NOTE: The new trunk lid light includes the modified gasket and the solid rubber.
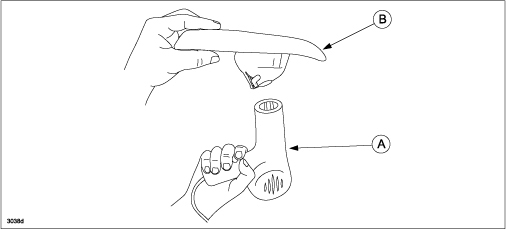
- Use an appropriate air drier (A) to dry the trunk lid light (B) inner lens surface. Position the trunk lid light so that the bulb installation hole is facing down.
CAUTION: Set air drier to the coldest setting. Using hot air could deform the lens.
- Blow air into the trunk lid light bulb installation hole from below until the inner lens surface is completely dry.
CAUTION: Do not use hot air. Using hot air could deform the lens.
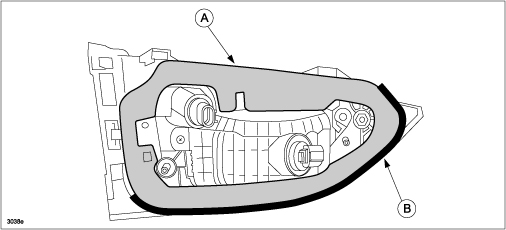
- After the inner surface of the lens is dry, remove the gasket (A) from the removed trunk lid light. Remove the packing (B) as well if attached. Discard them.
- Attach the gasket (modified service part) to the trunk lid light.
NOTE:
- A double-sided adhesive tape is attached to both sides of the gasket. Peel off the release paper before attaching the gasket.
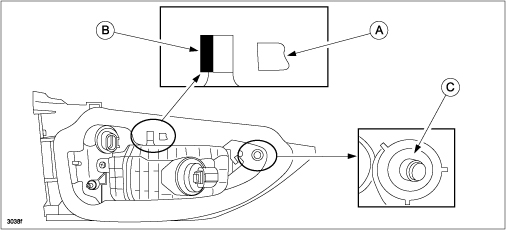
- Align the slit of the gasket and the position pin (B).
- Attach the gasket taking note of identification mark for Right (R) or Left (L) (A). Attach so that the gasket does not rest on the bolt flange (C).
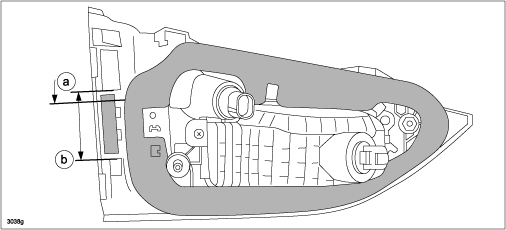
- Peel off the release paper from the solid rubber and attach it to the trunk lid light between “a” and “b”.
- Peel off the release paper (at body panel side) from the gasket and install the trunk lid light to the vehicle. Refer to MS3 online or Workshop Manual section 09-18.
PART(S) INFORMATION
| Case 1: When water drop stains can be removed by rinsing. The original trunk lid light is re-used. | ||
| Part Number | Description | Qty. |
| GHK1-51-3H8A | Gasket RH | 1 |
| GHK1-51-3J8A | Gasket LH | 1 |
| GHK1-51-3H9 | Solid Rubber | 1 or 2 |
| Case 2: When water drop stains can NOT be removed by rinsing and a new trunk lid light is installed. | |||
| Part Number | Description | Qty. | Note |
| GHK1-51-3F0D | Trunk Lid Light RH | 1 | The modified gasket and the solid rubber are included |
| GHK1-51-3G0D | Trunk Lid Light LH | 1 | |
